
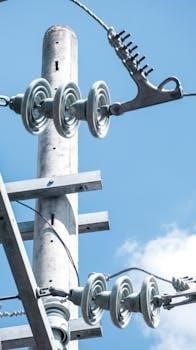
Understanding MIG Welding Wire Speed and Voltage
MIG welding relies on a delicate balance between wire speed and voltage. Wire speed dictates the amount of filler metal, while voltage controls the arc’s heat. Achieving optimal settings is crucial for quality welds.
The Relationship Between Wire Speed and Voltage
In MIG welding, wire speed and voltage are intrinsically linked. Increasing the wire speed demands a higher voltage to melt the additional filler metal effectively. Conversely, lowering the wire speed necessitates a reduction in voltage to prevent burn-through. Maintaining the correct ratio ensures a stable arc and consistent weld bead. The power source controls wire feed speed to maintain a constant current. Adjusting one without the other often leads to welding defects like porosity or excessive spatter, highlighting the need for precise calibration.

Importance of a MIG Welding Chart
A MIG welding chart is essential for determining optimal settings. It provides a starting point for wire speed and voltage based on material thickness, aiding beginners and experienced welders alike.
Why Use a Chart for Settings?
Utilizing a MIG welding chart streamlines the process of finding appropriate settings, preventing guesswork and wasted materials. Charts offer pre-calculated voltage and wire speed recommendations based on factors like metal thickness and wire type. This speeds up setup, reduces trial and error, and promotes consistent, high-quality welds, especially when starting a new project or working with unfamiliar materials. Furthermore, charts help minimize common welding defects stemming from incorrect parameter settings.
Factors Affecting MIG Welding Settings
Several factors influence optimal MIG welding settings. These include the metal’s thickness, the shielding gas type, and the diameter of the welding wire. Each element requires careful consideration for successful welding.
Metal Thickness
Metal thickness is a primary determinant of appropriate MIG welding settings. Thicker metals necessitate higher voltage and slower wire feed speeds to ensure adequate penetration and fusion. Conversely, thinner materials require lower voltage and faster wire feed speeds to prevent burn-through. The amperage, directly influenced by wire speed, must also be adjusted accordingly. Consulting a MIG welding chart that correlates metal thickness with recommended settings is highly advisable for achieving optimal weld quality and preventing common issues such as lack of fusion or excessive spatter. These charts offer a starting point for fine-tuning settings.
Shielding Gas Type
The type of shielding gas used in MIG welding significantly affects the arc characteristics and, consequently, the required voltage and wire speed. Different gases possess varying thermal conductivity and ionization potentials, influencing heat input and weld pool fluidity. For instance, argon-rich mixtures are often preferred for aluminum, while carbon dioxide is commonly used for steel. The choice of gas impacts the voltage needed to maintain a stable arc and the wire feed speed necessary to deposit the appropriate amount of filler metal. Consulting a MIG welding chart that considers the shielding gas type alongside metal thickness and wire diameter is crucial for optimal settings.
Wire Diameter
Wire diameter is a critical factor influencing MIG welding settings. A thicker wire requires higher voltage and wire feed speed to melt and deposit the metal effectively. Conversely, a thinner wire necessitates lower settings to prevent burn-through and excessive spatter. Selecting the appropriate wire diameter depends on the metal thickness and desired weld characteristics. Using a MIG welding chart is essential, as it provides specific voltage and wire speed recommendations for different wire diameters, ensuring optimal weld quality and minimizing potential issues like porosity or burn-back. Always match the wire size to the application.
Common MIG Welding Wire Types and Their Characteristics
MIG welding employs various wire types, each with unique characteristics. Steel and aluminum wires are common, demanding specific voltage and wire speed settings for successful welding based on their properties.
Steel Wire
Steel wire is a frequently used option in MIG welding, valued for its strength and versatility across various applications. Different steel alloys, such as mild steel or stainless steel, require specific considerations. When using steel wire, the wire feed speed is typically controlled to maintain a constant current, impacting weld penetration and bead profile. Selecting the correct voltage alongside wire speed is crucial to preventing issues like burn-back, porosity and spatter.
Aluminum Wire
Aluminum wire presents unique challenges in MIG welding due to its softness and heat sensitivity. Proper settings are crucial to avoid issues like wire feeding problems and burn-through. Given the characteristics of aluminum, the settings for wire speed and voltage must be precise. Charts often recommend higher wire feed speeds compared to steel, combined with carefully controlled voltage, to maintain arc stability and achieve a clean, strong weld. Shielding gas selection also plays a critical role in successful aluminum welding.
Troubleshooting Common MIG Welding Problems Related to Settings
Incorrect MIG welding settings often lead to defects. Recognizing and addressing these issues is key to quality welds. Adjusting voltage and wire speed can resolve many common welding problems.
Burn-Back
Burn-back occurs when the welding wire fuses to the contact tip. This frustrating issue is frequently caused by a wire speed that is too slow relative to the voltage. The excessive heat melts the wire back towards the tip, causing it to stick. To resolve burn-back, increase your wire feed speed or slightly decrease your voltage. Ensure proper contact tip size and consider anti-spatter spray to minimize adhesion. Regularly inspect your equipment for wear and tear to prevent future burn-back occurrences and maintain smooth welding operations.
Porosity
Porosity, the presence of gas bubbles within the weld, is a common MIG welding defect. Incorrect voltage or wire speed settings can contribute to porosity. If the voltage is too low, the weld puddle may not be hot enough to allow gases to escape, while too high a voltage can disrupt the shielding gas flow. Similarly, an inconsistent wire feed can lead to an unstable arc and introduce contaminants. Ensure proper shielding gas coverage, clean the base metal thoroughly, and fine-tune your voltage and wire speed to eliminate porosity and achieve sound, strong welds.
Spatter
Excessive spatter, the small molten metal droplets that scatter around the weld area, often indicates incorrect MIG welding settings. High voltage settings relative to the wire feed speed can cause the arc to become unstable, leading to increased spatter. Conversely, a wire feed speed that is too high for the voltage can also result in spatter. Other contributing factors include improper shielding gas coverage, contaminated base metal, or an incorrect work angle. Fine-tuning the voltage and wire speed, ensuring clean materials, and maintaining optimal technique helps minimize spatter for cleaner welds.
Adjusting Wire Speed and Voltage for Different Welding Positions
Welding position significantly impacts optimal MIG settings. Gravity affects molten metal differently in each position. Adjustments to wire speed and voltage are necessary to compensate for these effects and maintain weld quality.
Flat Position
The flat position is generally the easiest for MIG welding, allowing for higher wire speeds and voltage settings compared to other positions. Gravity assists in maintaining the molten puddle, enabling faster travel speeds and wider beads. This position typically requires a balance between wire feed speed and voltage to achieve proper penetration and a smooth, consistent weld bead. A slight increase in wire speed might be needed for thicker materials to ensure adequate filler metal deposition. Precise adjustments are key for optimal results in this favorable welding orientation.
Vertical Position
Welding in the vertical position presents unique challenges that require specific adjustments to wire speed and voltage. Typically, a lower wire speed and voltage are necessary compared to the flat position to control the molten puddle and prevent sagging. Welding upwards (vertical-up) generally allows for slightly higher settings than welding downwards (vertical-down). Precise control is paramount to ensure proper penetration and avoid undercut or excessive build-up. The key is to maintain a consistent arc length and travel speed while carefully monitoring the puddle’s behavior, adjusting settings as needed for optimal weld quality.
Overhead Position
Overhead welding demands precise control over wire speed and voltage due to gravity’s influence on the molten metal. Generally, lower settings are required compared to flat or vertical positions to prevent the weld puddle from falling. A faster travel speed and shorter arc length also help maintain control. It’s essential to use proper welding techniques, such as weaving or pulsing, to distribute heat evenly and prevent excessive build-up or lack of fusion. Careful monitoring of the puddle and consistent hand movements are critical for achieving sound, defect-free overhead welds. Adjustments may be needed based on material thickness and joint configuration.
Safety Precautions When Adjusting MIG Welding Settings
Prioritize safety when altering MIG welding settings. Ensure proper ventilation to avoid fume inhalation. Always wear appropriate personal protective equipment, including a welding helmet, gloves, and protective clothing, to prevent burns and eye damage.
Proper Grounding
Establishing a secure ground connection is paramount before adjusting any MIG welding settings. A properly grounded workpiece ensures a safe and consistent electrical circuit. Inspect the ground clamp for cleanliness and firm attachment to bare metal, free from paint or rust. Inadequate grounding can lead to erratic arc behavior, weld defects, and potentially dangerous electrical shocks. Always double-check the ground connection before initiating the welding process. Poor grounding can also damage your welding equipment. It is essential for safety and weld quality.
Eye Protection
Protecting your eyes is non-negotiable when MIG welding and adjusting settings. The intense arc emits harmful ultraviolet and infrared radiation. Always wear a welding helmet equipped with the correct shade lens, typically #10 or higher, to filter out these dangerous rays. Standard safety glasses worn underneath the helmet provide an extra layer of defense against sparks and debris. Ensure the helmet is in good working condition and the lens is clean for optimal visibility. Failure to use proper eye protection can result in severe burns and permanent vision damage. Prioritize your safety.
Finding and Using a MIG Welding Wire Speed and Voltage Chart PDF
MIG welding charts are invaluable resources. Finding and understanding a MIG welding wire speed and voltage chart PDF can significantly improve weld quality and reduce errors during the welding process.
Where to Find Charts
Finding the right MIG welding chart PDF often starts with checking the manufacturer’s website for your specific welding machine. Many manufacturers provide detailed charts tailored to their equipment, listing recommended voltage and wire feed speed settings. Online welding forums and communities are also great resources. Welding supply stores sometimes offer printed charts or can direct you to online versions. Ensure the chart aligns with your wire type and metal thickness before use. These charts typically offer starting points.
Interpreting Chart Data
MIG welding charts present data in a structured format, typically correlating metal thickness with suggested voltage and wire feed speed ranges. Understanding these parameters is key. Look for columns indicating material type, wire diameter, and shielding gas. The chart will provide a starting point, not a definitive answer. Consider the chart as a guide, and fine-tune settings based on your observed weld characteristics. Remember, environmental factors and personal technique play a role, so adjustments may be necessary to achieve optimal welding results and penetration.